Easter is upon us and nothing says Easter like lamb! Although it is more trouble than it is worth to cook for just one person this holiday I decided to go ahead and do something. I couldnt let today go by and just have cereal for dinner. So while out shopping in the meat department at Publix I saw their sale on lamb shanks. What is more Eastery than lamb?? Well perhaps a ham. But that is an Americanized Easter. I tend to believe lamb is more traditional. So lamb shanks it is! Lamb shank is a portion of meat from the shoulder that contains succulent meat as well as tendons and fat. This cut of meat is best when it is braised. Braising just means you are going to cook the meat in liquid to help break down the meat and make it tender.
Since I have all the time in the world why not make one for myself. Give myself a little taste of a proper Easter dinner even if its a dinner for one. And most recipes you find are for at least 4 lamb shanks but I didnt need that much so I took several different recipes and adapted it to work for one. One thing to note here is that the liquid needed to be enough to at least cover the shank half way. So I have way more liquid than I need to keep the meat tender while cooking.
Recipe:
1 lamb shank
1 large shallot, sliced
2 small carrots, sliced
3 garlic cloves, minced
3 small sprigs of rosemary
2 bay leaves
salt and pepper
1T tomato paste
1/3 bottle red wine
1c veal stock or chicken stock
In a dutch oven heat some olive oil over medium-high heat. Add lamb shank and sear on all sides. remove from pan and add carrots, shallots, and garlic. Saute until soft. Add red wine and deglaze the pan. Add tomato paste and stock and stir together. Add shank, rosemary, bay, and salt and pepper. Reduce heat to very low and cover. This will need to cook for several hours before it is ready to eat. Mine cooked for about 2 1/2 hours. I wanted to make sure it was plenty tender since there wasnt a lot of liquid and only one shank.
Pull out your shank and drain the braising liquid into a pot leaving behind the vegetables. Simmer the liquid until slightly reduced. If you want it thicker than an au jus then make a cornstarch slurry. This means take equal parts cornstarch and liquid and mix together well to thicken your sauces. The slurry keeps you from having clumps of cornstarch in your sauce.
I made polenta to go with my lamb. But potatoes or rice would work fine too. I garnished it with some roughly torn Italian flat leaf parsley.
So dinner turned out to be pretty good. I think it wouldve been better with someone to share it with. But oh well. Life goes on. The polenta was an excellent choice. And if you dont have polenta but want it....use cornmeal! So to all of you who love lamb like I do, this dish is for you! Slow cooked comfort food at its best!
Okay, I am a little late in blogging for April Fools Day, but rather late than never right? Well that is my thinking at least. Last year I made the "sushi" that was rice krispie treat wrapped in fruit leather with fruit slices. So what could top that? Perhaps "lasagna" could. And it was worth a shot! So I drug the kids to the grocery and together we forgot our list and winged it! So here is my winged version of fake lasagna.
Ingredients:
vanilla pudding mix (made as directed on box)
pound cake sliced into 1/4in slices
small tub ricotta cheese
powedered sugar
1/2 small jar strawberry jam
oreo cookies
bananas
white chocolate, shaved
mint, sliced
Mix your ricotta with 6T or more of powdered sugar. I pulsed my through a small food processor to make it smooth like cannoli filling. Use your own personal tastes on the sugar.
The recipe said to take 5 Oreo cookies and crush them up and add to your jam. But either I did something wrong or crushed the cookies too much or something else because when I mixed them together the color turned almost black instead of staying strawberry red. So if I ever did this again I do not think I would add the Oreos to the "marinara". But use your own preferences here.
In a small casserole dish place pound cake slices. Gently spread some strawberry jam mixture over the pound cake. Then layer with sweetened ricotta. Take a banana and slice. Place the slices on top of the ricotta. Finish with vanilla pudding. Continue layering until all ingredients are used or the pan is full. Take your white chocolate and shave it on a cheese grater. Place the shavings on the top of the "lasagna" Top with sliced mint leaves. Unfortunately I didnt have any fresh mint in my garden and forgot to buy some. Oh well.

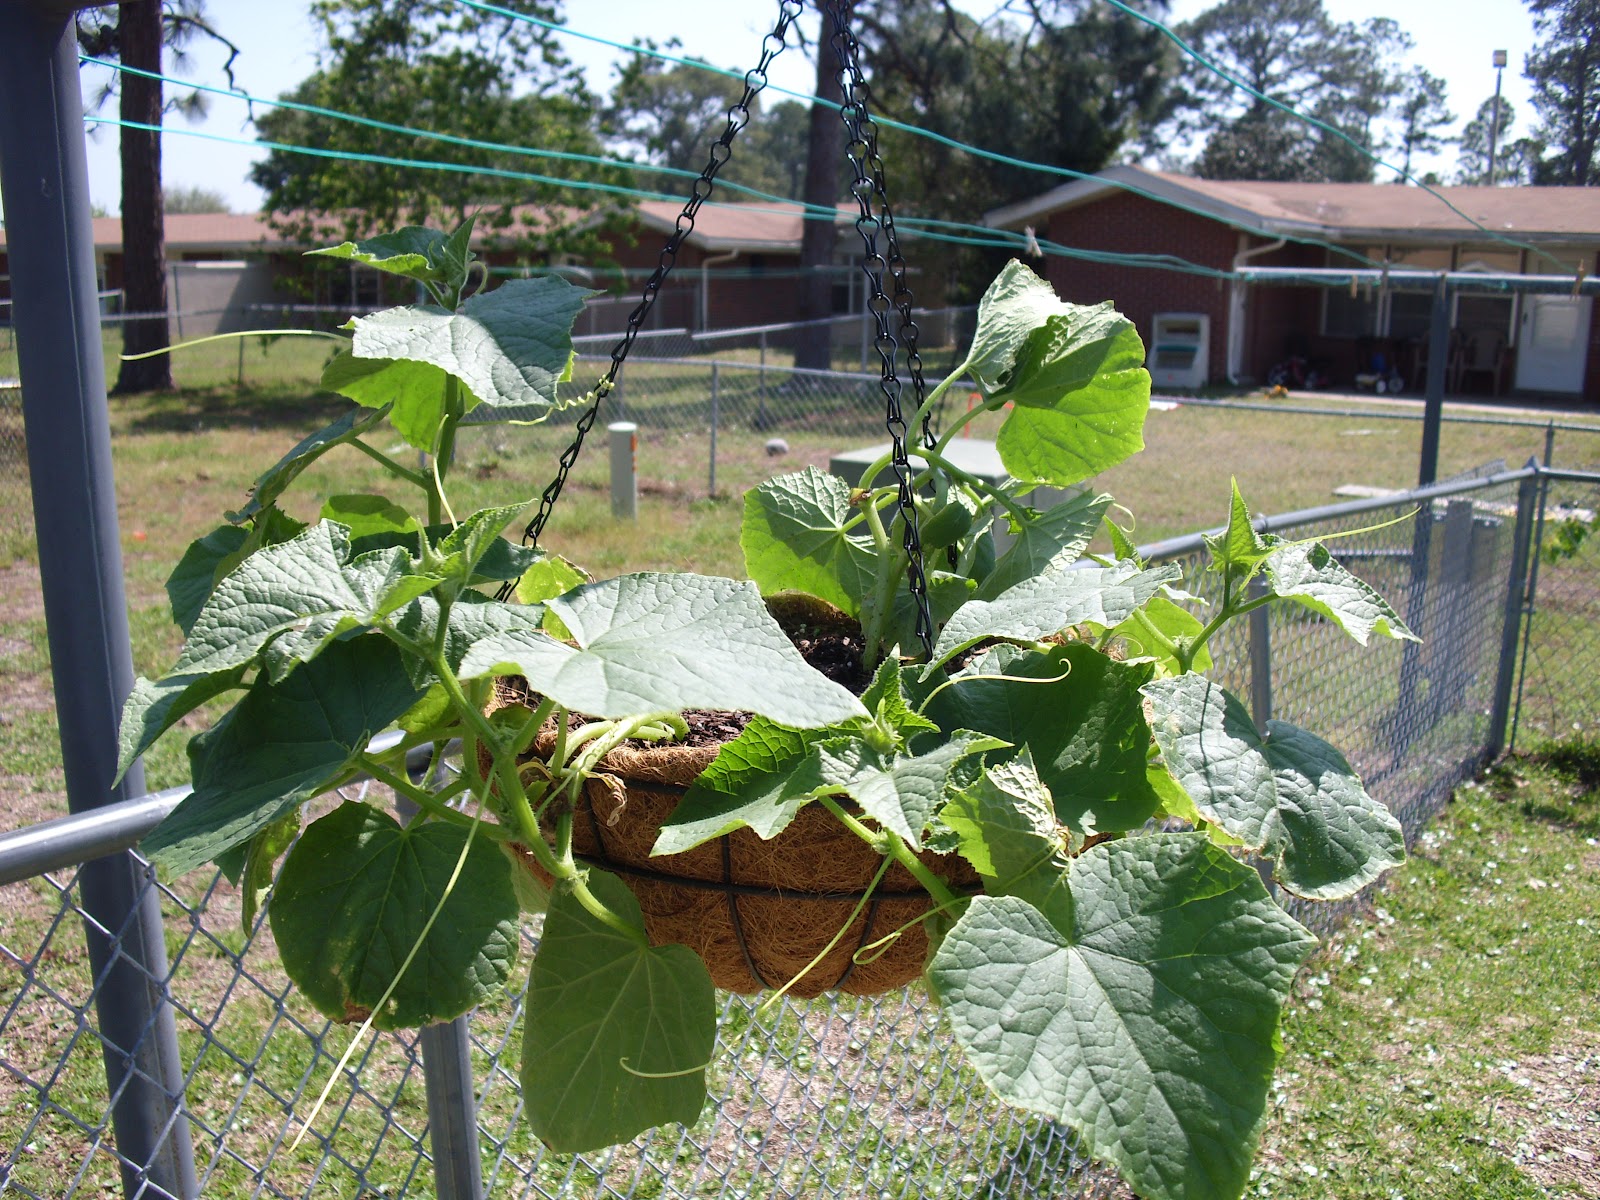
Well now that is is officially spring I thought I would share my progress on my garden. As you know we built the on the ground structure and then planted sugar peas, broccoli, cauliflower, and potatoes. Everything is really growing. The broccoli seemed to stop growing and since it was time to plant peppers, I decided to call that a growing lesson in gardening.
The sugar peas almost didnt make it. They got really withered looking and started shriveling up. My dad said it was due to the high heat for those plants. But the day I went to pull them out of the ground I noticed pods on them! Go figure. So I let them go a few more weeks. We didnt get but maybe 18 pods out of the garden that were edible and me and Anthony ate most of those after picking. But there were some pods with large peas inside that were very bitter. So I pulled them off the plants and took out the pea and dried it to try again next year. After pulling up my sugar peas I planted some purple beans my grandmother gave me. There is nothing to show for them but I only did it this week. So the blank spot in the back of the garden is the purple beans. I hope they turn out!!
My cauliflower has only just started to take off. And I cannot tell if I see some formation of a head inside the leaves or not. But I am excited that 3 of them survived.
The potatoes have just kept growing more and more every day. I am waiting for about another month before checking on them. I think they should flower but I am not 100% on that. I am still new at all of this and learning as I go along.
Since I pulled up the broccoli you may be wondering what I planted that was so important. Well peppers of course!! I planted some sweet banana peppers, red and green bell peppers, jalapeno peppers and poblano peppers. Although you would not believe how hard it is to find a poblano plant. So far I have only found one! I am very excited about those.
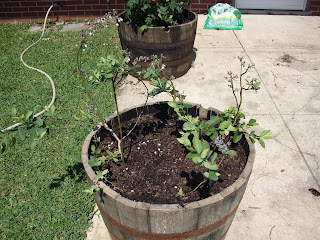
Now my boxed garden is full. But I wanted to grow more stuff. So we found these very lovely, but heavy, half whiskey barrels at Home Depot that we decided would look lovely on our back porch. So I have 2! One barrel has 2 blueberry bushes that have taken off. They already have at least a pint of new blueberries growing on the limbs. My dad was quite suprised a few weeks ago when he saw them. And everything I read told me that a blueberry bush would produce the first year but not a lot. But these seem to be scary good and blooming and producing berries. So heres to hoping!
Alright, dont freak out yet. You know you are intrigued! Everyone nowadays is looking for a way to make their junk food healthier. And that includes brownies. Now for me, Im not a big brownie fan. I eat them from time to time but I dont seek them out. Recently I was on the mighty facebook talking with some friends about food and one of them recommended a site for healthy zucchini brownies that she swore were delicious. To check out the ladys site click here. About a week went by and one lady tried them and loved them. She posted on my wall what she did and how well she liked them. So I decided I ought to jump on the bandwagon and try them. So I hauled myself off my comfy couch ( it was the week after the kids spring break) and head to the grocery store for the items necessary to complete the recipe. And now without further ado I give you a healthier version of brownies!
Recipe:
2 eggs
1T vanilla extract ( I used my own homemade)*
1/4c applesauce
3/4c agave nectar (although others have used honey instead or 1c regular sugar)**
1/4t salt
1c whole wheat flour***
1/2c unsweetened cocoa powder
1 1/2t baking soda
1t cinnamon
1/4t ground cardamom (it has been suggested to use a chili powder instead)****
2c grated zucchini
1 1/2c semi sweet chocolate chips (I used abot 3/4c and it might be too much)
1/2c chopped nuts (not in original recipe)
*I make my own vanilla extract
**Agave nectar is a sugar substitute. I prefer this sweetener. It is not quite as sweet as honey and I do not like honey. Some of my friends have begged to differ and believe honey is better for you and tastes better. So use what you prefer.
*** This recipe called for Whole Wheat flour. This is not something I typically keep in the house. But I decided to go with it and use the King Arthur brand. From my limited knowledge of baking and whole wheat flour, when you bake with it you typically need to cut it with white flour so when I saw the white wheat flour I opted for that instead of whole wheat. But use your own judgements.
**** Cardamom is not a typical spice in most peoples cabinets. It happens to be one in mine due to my love of Middle Eastern food. So I wanted to show people what it looked like. I also use a very flavorful cinnamon that is not typically found in grocery stores. I buy Ceylon cinnamon which has a more pronounced flavor. Going back to store bought cinnamon almost feels like a sin now! I highly recommend buying. I get mine from My Spice Sage. You can catch some really good deals from them too!!
Preheat oven to 350 degrees.
Mix together your eggs, vanilla, applesauce, agave, and salt in a medium bowl.
In a large bowl mix together flour, cocoa powder, baking soda, cinnamon, and cardamom. Add in your egg mixture and mix until just combined. Add in your zucchini and chocolate chips and nuts. Pour batter into a small dish, greased.
Bake for 30-40 minutes or until toothpick comes out clean.
The brownies stay super moist due to the high water content in the zucchini. It is tasty. You cannot tell there is zucchini in it for all you veggie haters. It is one of those great veggies that is easy to sneak into sweets. I mean think of zucchini bread! The spices were a nice touch although I am still undecided if I like the cardamom in them. I believe the suggested chili spice would have been a better touch. And I am very glad I added the nuts into the brownies. I need that crunch factor in a brownie to mix up the soft textures. It gives my mouth a break from mush.
Overall I am happy with the result. I do wish I had someone to feed the brownies to and give another opinion on. But I did save my leftover zucchini and froze it so maybe I will make some for my unexpecting visitors!! MUAHAHAHA!! Talk about sneaky..........although if I proclaim this on the web, perhaps my plan is foiled.......much to consider.
Anyways, if you are health conscious or just looking for a way to cut some calories or add some more nutrition into your life or like me just do something different because you can then try this out. You may be pleasantly suprised.
Today is a day that I felt like a little decadence and sophistication. I am talking of course about the demure fried salmon patty. Oh man talk about delicious! It instantly conjures images of my childhood. I can remember eating then with my Dad on weekends. We would eat salmon patties and fries dipped generously in ketchup and lots of hot sauce. And to this day the smell of that prepackaged salmon makes me feel all warm and fuzzy inside. And with a feeling like that this dish is something I will never abandon despite my feelings of love toward hoity toity foods like lamb chops and my relationship with all kinds of ethnic foods from Asian to Latin to Middle Eastern. This is something I feel is down home southern food at its best. So dont knock it. Try it and see what you think. And yes, I am sure there are TONS of ways I could take this humble inexpensive meal and turn it into something more gourmet. But I won't. It is like messing with a childhood memory and altering it to make it better than it was.
So what is in this dish? The simplest things in the world!!
Recipe:
2 cans salmon (either bones in or out...just make sure if using the ones with bones and skin that you remove all of that before using....and unless you are in a huge hurry I would recommend bone in)
1 egg, lightly beaten
1/4c all purpose flour
1/4c cornmeal**
salt and pepper
**the best cornmeal in the world is Hoover's fine white cornmeal. And most people in this part of the state will agree that nothing compares to it. So do yourself a favor and have some shipped to whatever part of the country you are reading this from.
Simply add all the ingredients together and form into balls or patties, depending on personal preference.
Heat a skillet with about 1/4in of oil. You want enough in the pan so its frying and not sauting. You want your heat at about medium-high. Since the salmon is ready to eat you just want a nice brown crust on the outside.
Flip only once. Drain on a papertowel.
Add copious amounts of ketchup and Louisiana Hot Sauce which is my personal all time favorite hot sauce. Nothing compares to its flavors.
Not sit down and enjoy a glimpse into my childhood and hopefully make some memories of your own!!
Lemon.....oh yes. I love lemon desserts. Dont you? Well maybe you dont. I know my husband doesnt like lemon stuff often. But then give me a lemon poppyseed muffin and I am in heaven. I even made a lemon cream pie a couple of weeks ago. But this recipe comes from the King Arthur Flour magazine. Mostly it is a catalog to buy their products but they do have some recipes in there and this may even be the first one I have tried. I am sure you could find the recipe on their website if you looked.
First thing is if you do not have store bought lemon curd you will need to buy some or make your own. I opted to make my own with some lemons I had in the fridge. I did this the night before so it could firm up and chill before using in the danish. I got my lemon curd recipe from Martha Stewart. To use this recipe click here.
Sponge:
3/4c warm water
2t sugar
1T instant yeast
1/2c all-purpose flour
Combine the sponge ingredients and loosely cover with plastic wrap. Set aside to proof for 15 minutes.
Dough:
all of the sponge (above)
3/4c plain yogurt (i used sour cream....I didnt have yogurt)
1/2c unsalted butter, softened
2 large egg,s beaten
1/2c sugar
2t salt
2t vanilla extract ( i used my homemade bourbon vanilla)
5c all-purpose flour
With your hands, stand mixer, or bread machine on the dough cycle, mix together the sponge with the dough ingredients to form a smooth shiny dough. Allow the dough to rise for 60-90 minutes, until quite puffy and nearly doubled.
Filling: (my modified version)
1 tub of fat free cream cheese, softened
1/2c confectioners sugar (more as needed until desired sweetness)
1/2c prepared lemon curd
Mix together the cream cheese and the sugar until smooth. Reserve until ready to spread on dough.
Now you are ready for the braiding process. The King Arthur site may have pictures like they did in the book but you are just going to have to follow along with my explanation and pictures or find the recipe yourself.
Take your dough and divide into 2 portions. Working one piece roll it out into a rectangle large enough to fit your cookie sheet.
They recommend rolling it on parchment paper to help with the transition to the sheet easier. But I find if you roll the dough lightly around your rolling pin it will transfer just as easily. Now lightly draw two line on the dough that will divide the dough into 3 equal strips.
Spread your cream cheese mixture down the center third of the dough leaving the ends free of filling. Then layer your lemon curd on top of your cream cheese mixture.
Using a small knife or a ravioli cutter make diagonal strips every 3/4in. If you prefer you can fold the bottom inside and keep the look more professional or not worry about it and keep it more rustic looking. Start folding over your strips of dough to form a mock braid. Set the braid aside and let it rise for 45-60 minutes until slightly risen and puffy.
At the end of the rising process brush with an egg wash and sprinkle coarse sugar over the top. I actually took this from the hotel room we stayed at last weekend. It is not hard to find in stores, but I rarely use it and they had this sitting with the coffee accessories in the room. So we took it home!
Bake at 375 degrees for 25-30 minutes or until golden brown.
It is important to note here that I only made one loaf of bread. They make the cream cheese mixture spread out for both loaves but they never give me enough cream cheese to make me happy. So if you like as much cream cheese as I do then this will only make one loaf. So take your other half of dough and place in a freezer bag and keep frozen until you are ready to make this again. And who knows maybe you want to try another flavor. Strawberry, raspberry, blackberry, blueberry...or even fig! Have fun!!
Nothing says I love you quite like French comfort food from none other than Mrs. Julia Child. I mean she is a classic. How could you go wrong with her food? It may not be up to modern standards of haute cuisine but it is still pretty tasty food. And one of Alexs favorites is boeuf bourguignon. This dish does take some time to prepare.....shocker huh?.....but it is well worth it. I mean have I steered you astray yet? I didnt think so!
Ingredients:
6-oz chunk of bacon or just regular slices
1T olive oil
3lbs stew beef cut into 2-in cubes
1-2 sliced carrots
1 sliced onion
1t salt
1/4t pepper
2T flour
3 cups red wine
2-3c beef broth
1T tomato paste
3 cloves garlic, mashed
1/2t dried thyme
2 bay leaves
18-24 small pearl onions
1lb washed, quartered mushrooms
I do things slightly different from Julia but I think it comes together just fine in the end. If you want her recipe then you can google search this and should come back with it or check anybodys cookbook of Mastering the Art of French Cooking. It gives step by step instructions for you. But since this is a blog about my food then I will share my version and modifications. If they do not suit you, then no biggie.
Directions:
Preheat your oven to 450 degrees.
Take your bacon and cut it into lardons (sticks about 1/4in thick and 1 1/2in long). Heat a large dutch oven (must be a dutch oven or something ovenproof as well as work on the stove) on medium heat. Add your bacon lardons and saute until just golden. Do not over cook. Remove bacon and drain on paper towels.
Take your cubes of beef and pat each and every piece dry. They will not brown correctly if they are wet. Turn the heat up to medium high and place the beef cubes a few at a time in the pan to brown. Do not be overly concerned with them being completely cooked. If you add too many to the pan your meat will not brown, Instead it will steam. Once these pieces are browned set them out on a paper towel lined plate. Finish cooking the remaining pieces of meat. My kitchen usually gets really smoky during this phase. I have to turn the fans on and open windows and sometimes even doors. But the point is to get a good sear on your meat and doing it on a lower heat doesnt get you where you want to be.
Once all of your meat is browned reduce the heat back down to medium and add in your carrots and onions. Season lightly with some salt and pepper. Once the onions and carrots are almost tender add back in your beef and bacon and toss together. Add in the flour and toss everything together.
Place the dutch oven in the oven with the top off for 5 minutes. Toss together the meat mixture and let it cook for another 5 minutes. This browns the flour getting the rawness out and puts a light crust on the meat.
Reduce the heat of the oven to 325 degrees. Remove your dutch oven and place back on the stovetop. Turn the heat to medium. Add your wine to the pan and scrape the pan to get the browned bits off the bottom of the pan. Add in the broth and tomato paste. Bring to a simmer. Add in your garlic and herbs. Cover your dutch oven and place in the oven. This will cook very slowly for 2-3 hours. The meat is done when you can pierce it with a fork easily.
It is at this point that me and Mrs Child part ways. My stew doesnt have a whole lot of liquid left in it. and I rather like having the liquid like it is. So I saute my mushrooms and if you like pearl onions (I do not and always leave them out) in butter until they are cooked through. Add the cooked mushrooms and onions to the pan with the meat and stir together. Once everything is evenly coated with sauce and is hot it is time to serve.