So I became a member of Pinterest some time ago but I did not really post anything or look at other things people had posted. Well.....all that changed last weekend. I was bored and ended up on Pinterest and it snowballed from there! Bless my heart is all I can say!! But I ended up on one particular website, Bev Cooks and and thoroughly enjoying reading her blog. But this one looked easy and tasty. My step-mom came in to town this past week and when I showed her all the recipes that looked good and she honed in on this one. So I got all the stuff to make it but it just never fit intou our plans. So I decided to make it today for lunch for just me. And it worked out pretty well if I do say so myself.
Recipe:
1T each cumin, cinnamon, coriander, and tumeric
1 sweet potato, diced or julienned
3 medium carrots, diced or julienned
2 chicken breasts
1/4c chopped fresh parsley
3T fresh orange juice
1t fresh orange zest
1/2t cardamom
1/2c olive oil
salt and pepper
salad greens
*the dressing here didnt have enough bite for my taste so I added about 1-2T of apple cider vinegar to my dressing and it gave me the bite of a vinaigrette dressing I was looking for.
*adding in dried cranberries or golden raisins gives the salad a nice sweet chewiness.
Preheat oven to 400 degrees.
Mix together your cumin, cinnamon, coriander, and tumeric in a small bowl. Place your sweet potato and carrots on a baking sheet and drizzle some olive oil to lightly coat. Sprinkle some salt and pepper and half of your spice mixture over the veggies. Bake for 20-30 minutes or until chicken is cooked through and veggies are soft. I butterflied out my chicken breast so it would cook quicker. I also julienned my veggies because I thought they looked better that way.
While all of that is cooking go ahead and make your dressing. Whisk together your parsley, orange juice, orange zest, cardamom, salt and pepper. Slowly drizzle in your olive oil to keep it emulsified. If you like a tart vinaigrette feel free to add the vinegar at this stage.
Place your salad greens on your plate. top with roasted veggies and roasted chicken. And drizzle over your dressing. If you want the cranberries add them under the dressing.
This was a very light and easy meal. With it being so hot you just dont want to put a lot of heavy foods in your stomach. And at night I just do not feel like cooking so it made for a very nice easy lunch. I will do a few things differently next time. I had the idea of maybe using sweet potato fries that you can buy in the freezer section. I think they would add a nice crunch to the salad that I was missing. And it could be that I used butter lettuce instead of a crunchier lettuce. And while the spices were ok in the salad they were not as strong as I was hoping for. It is a good starter salad. Or something different but it didnt feel like Morocco to me. So keep that in mind when making this and you will have a very easy and refreshing salad for these hot summer days!!
Well it is time for another family lunch at my grandmothers house. This time in honor of Fathers Day. And as I scoured my recipes for a dessert to bring I found this recipe and lit up like a Christmas tree!! It is everything I love in a good family function recipe. Its relatively easy, transports nicely, and is a show piece! How can I resist??
So I decided to go for it and try to recreate this wonderful piece of art!!
Recipe:
1 box chocolate cake mix (I used Germn chocolate)
4 large eggs
1c buttermilk
1/2c vegetable oil
1/2 bag sweetened coconut flakes
1 can chocolate frosting
1 can vanilla frosting
Mix ingredients together with a mixer. I used a small cake pan and two glass pyrex, oven safe bowls. You need it to have a cylindrical type shape. I just wish I had a small cake pan. My cake is going to look a little squatter than this cake. But thats okay. I am sure it will work out just fine. Bake for 20-30 minnutes or until toothpick comes out clean. Cool on a wire rack.
Take 1/2 a bag of sweetened coconut and place is a skillet over medium heat. Stir continuously so the flakes do not burn. Once the coconut flakes are toasted and brown, remove from the pan and let them cool completely.
Once the cake is completely cool assess your 3 layers and decide which layer will be on the bottom and top. And if your flat layer is larger than your bowl cakes you need to trim it so they are level. I had to do this. Place your bottom layer on a cake plate and place a layer of chocolate frosting on top. Place your flat second layer on top of the frosting and add some chocolate frosting to the top of that layer. Finally take your top layer and gently cut a circular hole in the top. This will be what looks like the top of the coconut drink when frosted. Place your layer on the frosting.
Take the chocolate frosting and frost the outside of the cake making sure not to get the top of the cake and leaving a 1 inch border at the top on the side.
Taking your vanilla frosting frost the inch border and the top of your cake. I went ahead and took a small knife and frosted the inner circle of the cake and all the corners around the top where you are not going to put coconut. I didnt read the directions well enough and vanilla frosted the entire top layer. No biggie you just see a little white frosting through some of your coconut.
Take your cooled toasted coconut and gently cover the entire outside of your cake. Make sure all the sides are completely covered so you dont have any gaps in coconut.
Garnish with some tiki straws or candied pineapple on bamboo skewers or any other dried candied fruit you like.
Unfortunately the decorations would not fit with my cake topper on it so I decorated once I got to my Grannys house. And I forgot to get a picture of it with my tiki straws. But you see the original photo I was copying so you get the idea. I was putting my straws in the cake and my uncle looked at me like I was crazy. I tried to explain it was for presentationl flair! I think my Dad just shook his head and laughed. But you know what? Everyone loved the cake. They may not have realized it was suppose to look like a tiki drink but it ate well and really.....isnt that the main thing for any food function? So I call this a success! Hope if you try it you like it!
Ok before you freak out, this is not a roadkill kinda dish! In fact there is no armadillo in it anywhere. I am sure you are thinking with me there is no telling. But I promise...no armadillo! These are cheese stuffed, sausage wrapped jalapenos!! Ahhhh..........now I got your attention!! I have been getting just tons of jalapenos out of my garden this season and I thought I might make a stuffed jalapeno to take to a family function this weekend. As I started searching the internet for ideas I came across this one on the Serious Eats website and fell in love. And I believe that after you see these you will be in love too!!
Recipe:
8oz low fat cream cheese
2c sharp cheddar cheese
1-3T chopped cilantro (depending on how much you like cilantro)
18-24 large jalapenos, seeded and halved
3lbs loose breakfast sausage
your favorite BBQ seasoning
In small bowl mix together cream cheese, cheddar cheese, and cilantro. I think next time I might add a little chopped fresh garlic.
Take a small spoon and place a dollop of cheese mixture in the jalapeno. I kept them flush with the top of the jalapeno.
Take a small ball of sausage and flatten it out. Place the stuffed jalapeno in the center of the sausage and gently fold around it forming an oblong egg-like shape. Place on a baking sheet until you have finished balling all of your jalapenos.
The original recipe called for grilling the eggs with some apple or cherry wood. I am not allowed to touch the grill and even more so now that my husband is deployed. So I used the grill pan for the stove.
Lightly sprinkle your BBQ seasoning over your eggs and grill. Cook for about 20 minutes making sure to brown all the sides.
Once sausage is completely cooked through lay on a paper towel lined plate to drain. Serve to your guests or yourself and enjoy the deliciousness!
I wasnt sure how these little wrapped packages would go over with my family, a lot of them are not big spicy food eaters, but more of them tried them than I thought. And everyone who had one loved them! And oh man they were good even after traveling 2 hours. So pull these little suckers out for your next party and become a food goddess!!
Ahhhhh summer. What a lovely time of year for fresh produce. And sometimes the best fresh produce needs to remain fresh and not cooked. This year most of us on my Dads side of the family planted purple beans this summer. Purple beans are just green beans that are purple essentially. Although they do turn green once cooked. And while my garden is small and I could only plant two small rows of beans my Dad was able to plant considerably more than me. Why is that important in the grand scheme of things? It is not unless I go to visit him and am able to take advantage of his garden produce! And he had bags of fresh picked purple beans. I had been forming an idea in my head of eating them in either a bean salad or bean and pasta salad. Because to be honest with you those beans are delicious right off the plant. In fact I ate almost as many as I picked while we were outside. They are just so sweet and crisp. They are never any better in my opinion. And while cooking or steaming them tastes good too, I wanted to find a recipe that would allow me to indulge in the crispness of the raw bean. And this is the recipe we ended up with. And I hope you enjoy your fresh produce as much as we did!
Recipe:
8-oz purple beans, cut into 1cm coins
1 pint fresh cherry tomatoes, halved
1 ball of fresh mozzarella, cubed
handful of basil, chiffonade
Place in a large bowl and gently toss.
Dressing:
1/3c white balsamic or white wine vinegar
1/2 small shallot, minced
1/2 clove garlic, minced
1/3-2/3c extra virgin olive oil (depending on how tart you like yours)
salt and pepper
Combine your ingredients and whisk to make sure it is emulsified. Pour over your vegetables. Gently mix to coat every piece. Let it sit for half an hour. This can also be made several hours in advance, just make sure and toss the salad together before serving to make sure the vinaigrette is mixed and evenly distributed.
This was a very light and refreshing salad that would be a great addition to any summer meal. Ours just happened to be ribs. The burst of flavors in your mouth was just wonderful. I think I overdresed the salad and the beans lost a little bit of their sweetness. But I suppose thats the price you pay sometimes. But overall it was a very delicious dish that I absolutely recommend. So happy summer eating everyone!!
So here is another wonderful recipe to use up some of my cherry tomatoes. I was watching The Cooking Channel and they were in Florence and a chef there made this recipe. And how I just love Italian food. Ask anyone. And I think I am pretty good at it too. So when I saw they were making gnudi and using a cherry tomato sauce I rewound the channel to get a better look at the meal. And after taking some notes on what it looked like and what they said was in it I made it tonight. But just in case you are not familiar with gnudi I will enlighten you. Gnudi is a dumpling very similiar to gnocchi but made with ricotta instead of potato. So if you are a fan of gnocchi then you will most likely like gnudi. So without further ado......
Gnudi Recipe:
1 small carton ricotta cheese
1/2c chopped spinach
3 cloves garlic, minced
1/4c grated parmesan
salt and pepper
In a small skillet add some olive oil over medium heat. Add garlic and saute for 30 seconds. Add spinach and saute until cooked through. Let it cool down.
In a medium bowl combine together cheese, spinach mixture, parmesan, salt, and pepper.
Take a generous amount of olive oil and rub it all over your hands, kind of like you are washing them in olive oil. And take small amounts of ricotta mixture and roll into balls. The size really depends on you and how you want to make yours. Mine were roughly the size of golf balls today.
Tomato Sauce:
1 pint cherry tomatoes, quartered
4 garlic cloves, minced
1/4c basil, sliced
salt and pepper
olive oil
In a medium pot add some olive oil and heat over medium heat. Add the garlic and saute for 30 seconds. Add in tomatoes, basil, salt, and pepper. Bring to a simmer and keep at low heat for 20-30 minutes or until tomatoes release their juices and are cooked down.
To assemble this gnudi dish take 4-5 small oven proof dishes ( I used mini quiche and mini loaf pans) and place on a baking sheet. Preheat oven to 300 degrees. Place a small spoonful of tomato sauce into the bottom of the dish. Place 2-4 gnudi (or more if you made smaller balls than me) on top of the tomato sauce. Place another 1-2 spoonfuls of sauce onto gnudi. Sprinkle on a generous helping of parmesan cheese.
Place in the oven and bake for 15 minutes. Now while this is what the tv said I had to crank up my oven to 375 degrees after leaving it in the oven for 30 minutes on 300. I wanted the juices to be bubbling before taking it out and the parmesan to be golden in color. So I cranked up the oven and maybe at a higher temperature it wouldve only taken 10 minutes. So watch your oven and your times because they may need to be adjusted accordingly.
This dish was very good. And for a dish that I make it was very easy to make. I got to use up another pint of fresh cherry tomatoes from my garden and that was my biggest thing. So this dish is another keeper. I think the sweetess of my tomatoes cuppled with the cooking of them brought out a lovely sweet acidic flavor that brought the whole dish together in a very lovely manner. So try this dish! You wont regret it!!
Well my cherry tomato plants are just taking off and producing more fruit than I know what to do with. I am not a big tomato fan either. So I was searching the internet for a recipe that would help me use some of the tomatoes I have gathered. And I love Lidia Bastianich and her website was the first place I went to. And she did not disappoint!! I found this wonderful recipe. So when my step-mother came out to help me with the kids I could not resist making it for her. And she did not disappoint! She always makes the best yummy noises that boost my cooking ego. And you can bet that I will absolutely be making this recipe several times over the summer while I have a plethora of fresh summer cherry tomatoes. So I highly recommend this recipe!!
Recipe:
3 pints fresh cherry tomatoes
1/2c olive oil
1/3c breadcrumbs
1t kosher salt
1/4t pepperoncino flakes (red pepper flakes)
1lb spaghetti, gemelli, or penne pasta
10 plump garlic cloves, sliced
2T fresh Italian parsley, chopped
1c fresh basil leaves, thinly sliced (julienne)
1/2c parmesan cheese
Preheat oven to 350 degrees.
Halve your cherry tomatoes. Toss with 3T of the olive oil in a large bowl. Top with breadcrumbs, salt, and pepperoncino. Gently toss and pour onto a parchment or foil lined baking sheet. Spread them out evenly into a single layer on the sheet. Bake until they are shriveled slightly and starting to caramelize, about 25 minutes.
Meanwhile fill a pot with water and salt it generously. Bring to a rolling boil. When the tomatoes are nearly done place the pasta in the water to cook.
As soon as the pasta is cooking, pour the remaining olive oil into a large skillet over medium-high heat and scatter in the garlic. Cook for a minute or two until it is sizzling and lightly colored. Then ladle in 2c of the pasta water and bring to a boil. Let half of the water evaporate then lower the heat and stir in the chopped parsley. Keep the sauce barely simmering.
As soon as the tomatoes are done, remove from the oven.
Once the pasta is al dente, lift it from the water and let it drain briefly and place into the skillet with the sauce. Toss the pasta quickly with the parsely sauce. Then add in the parmesan. Once incorpoated add in the cooked tomatoes and the sliced basil. Toss together gently. Mound generous portions onto your plate and serve immediately.
This dish was a perfect example of what summer food should be. The tomatoes were fresh and wonderfully sweet and made even better by baking them. The pasta was cooked perfectly and not heavily dressed so the meal was not heavy. But it was filling enough to please even a meat eater. The freshness of the basil was also very refreshing. And the best part was how inexpensive this whole meat cost me. I grew the tomatoes myself and I had the herbs in my box so it was cheap and very very tasty!! I absolutely encourage you to make this with your own fresh cherry tomatoes! Venite a mangiare!!
You know for a self proclaimed non-baker, I sure am making a lot of baked goods. How does that happen? Oh I know! I love desserts thats how! And this time my dessert making was intensified with my mother in town. She loves desserts as much as me. In fact there was one night for dinner we had boiled peanuts and key lime pie! Healthy and nutritious right? lol! Well this dessert was an inspiration from a local cupcake shop we found in downtown Fort Walton Beach. It was called Cupcakes by the Beach. She only had about half a dozen options and we chose 3 of them. We tried the Red Velvet, Chocolate Hazelnut, and Strawberry Shortcake. They were decent cupcakes but nothing spectacular. And after looking at her strawberry shortcake I started to get ideas of how I would make the shortcake cupcake. And sitting on the counter in front of me were some perfectly ripened and sweet smelling white peaches. So I looked over at my mother and asked if she was up for an adventure. I would make a better tasting white peach cupcake with my own whipped cream frosting. So we started scheming our next day's dessert.

I will go ahead and let you know up front that after making and eating this it tastes more like an actual shortcake than a cupcake. The cake part itself tastes more like pound cake than a white cake. It is very tasty and as long as you know its a shortcake and not a cupcake it tastes much better in your head!
Cake Recipe:
1 3/4c cake flour
1 1/4c all-purpose flour
2c sugar
1T baking powder
3/4t salt
1c butter, cubed and cold
2 eggs
2 egg whites
1c whole milk
1t vanilla and/or 1 vanilla bean scraped
Preheat oven to 325 degrees.
In a medium bowl combine cake flour, all-purpose flour, sugar, baking powder, and salt. Using a hand mixer or stand mixer. Add in butter and mix until just coated with flour.
In a small bowl beat your egg whites until stiff. In a separate bowl mix together eggs, milk, and vanilla. Slowly add the egg mixture to your dry ingredients in 3 parts. Then gently fold in your egg whites.
Next time I make these I may not do cupcakes since they do taste more like pound cake than cupcakes. Maybe mini loaf pans would be better.
Peach Puree:
6-8 ripe white peaches
1/2c sugar
Remove all flesh from peaches and place in a medium pot with the sugar. Bring to a low boil and simmer gently until peaches are cooked through. Using an immersion blender or regular blender puree the mixture. I left the skins on my peaches because I like the pink color of the puree.
I placed a small dollop of puree in the center of the cake batter in the tins and swirled it around with a wooden skewer providing a marbled effect. But it glomped to the bottom of the cupcake and we ended up with upside down peach cupcakes. Next time I might omit some of the liquid in the cupcake and replace it with the peach puree. I also might save 1-2 peaches and cut up and place some fresh peaches in a hollowed out center of the baked cupcake. So choose whatever method you think works best for you and if it turns out please be sure to let me know!
Be sure and save the remainder of your puree to drizzle on top of your cake later!
Bake cupcakes for 17-20 minutes. Cool on a rack.
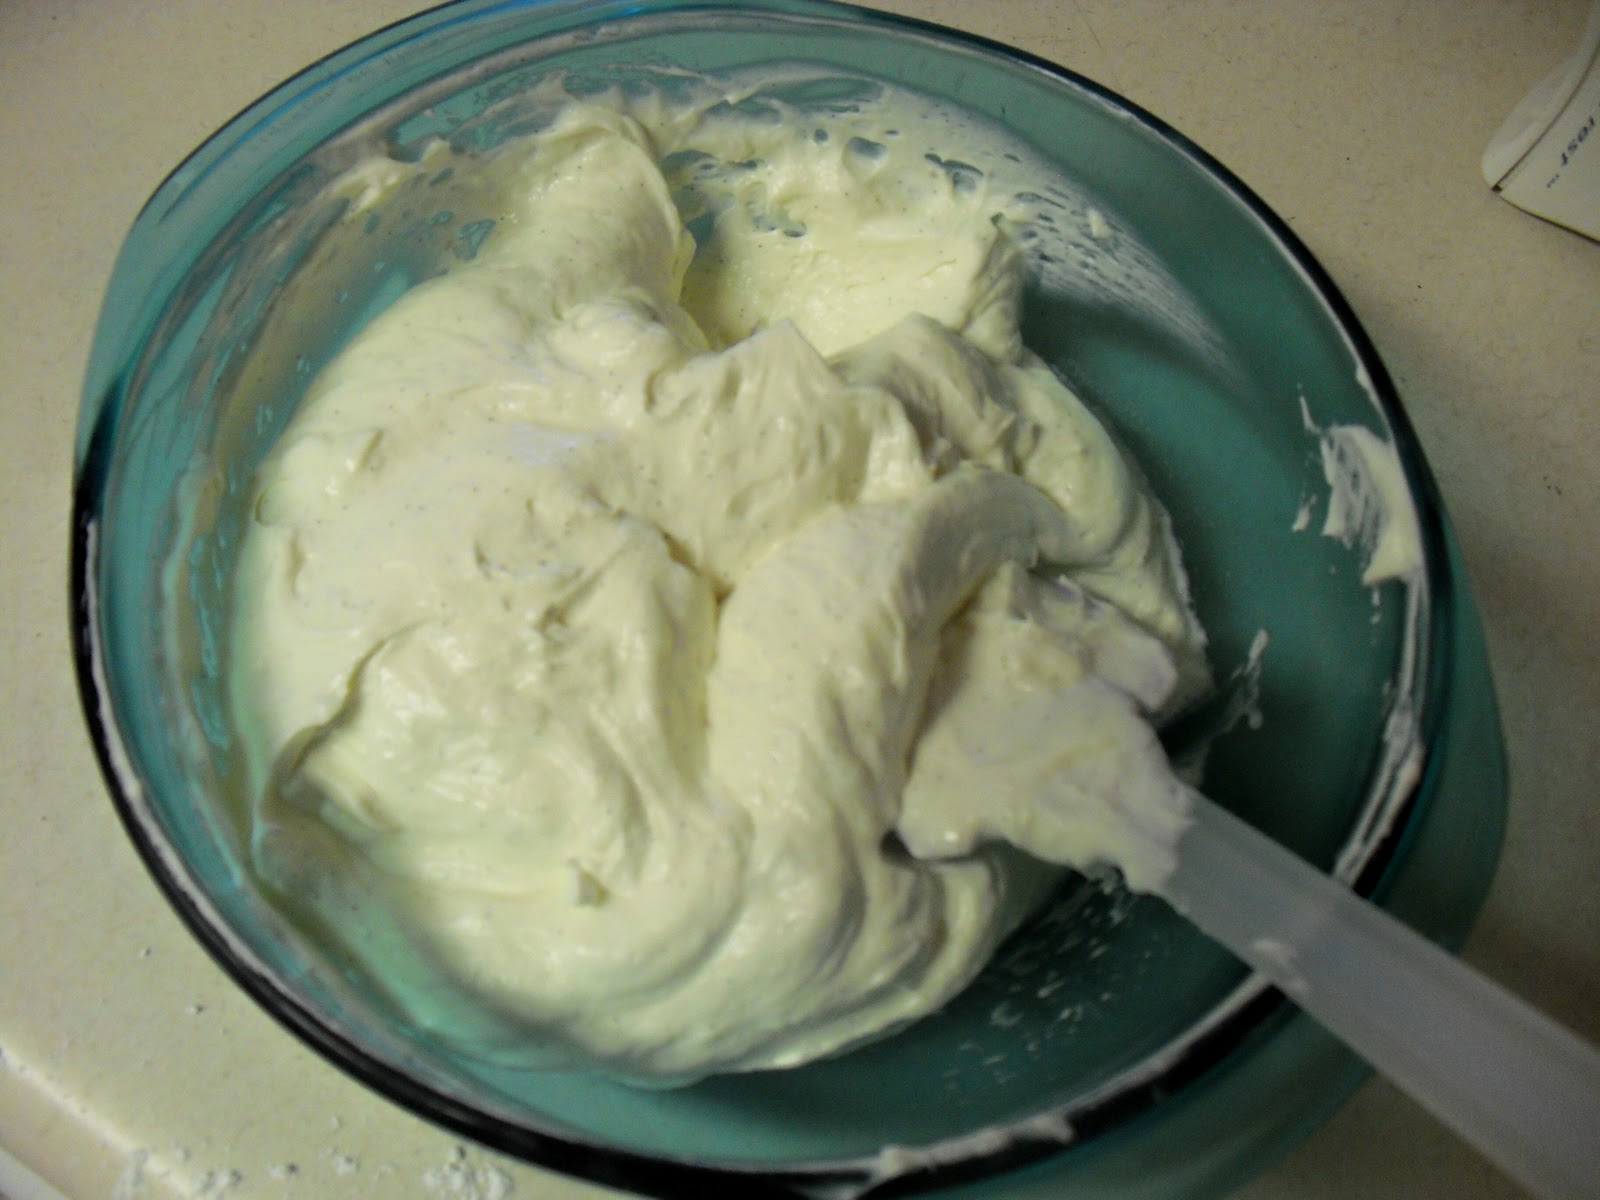
Whipped Cream Frosting:
8oz mascarpone cheese, softened
6T powedered sugar
2c heavy cream, whipped
Using a hand mixer combine mascarpone and powedered sugar until smooth. Gently fold in the whipped cream until fully incorporated.
Once your cakes have cooled dollop some frosting on the cake and drizzle generously with peach puree.
Hopefully you enjoyed your peach shortcake as much as we did. And any improvements you make to this first try please be sure and let me know!
This post will definitely not be for everyone and I realize that. This is another one of my crazy ideas that I put into practice that perhaps is not on most peoples radar even when presented to them. But thats okay. I like to think you enjoy my trials and errors in the weird food realm. So here is another one for the books. I saw this recipe in Bon Appetit. And just in case you were not aware this is one of my favorite magazines! But I saw this recipe and was completely hooked. I had to try it! Alex wasnt too sure about it. And when I showed my Dad he didnt seem too interested either. But that didnt stop me! Oh no siree. But in order to do this I needed brown and yellow mustard seeds. And where do I go when I need spices? My spice sage! You know for as much as I push their products youd think Id get something in return. Oh well. When you find a good place, with good prices you stick with them no matter the return.
And now that you have your mustard seeds it is time to experiment!!
Recipe:
*I halved the recipe stated here*
1/2c rice vinegar
1/4c brown mustard seeds
1/4c yellow mustard seeds
1/4c apple cider vinegar
1/4c sugar
1/2T salt
1/4c water
In a small saucepan combine all ingredients over medium-high heat. Bring to a boil and turn heat to low and gently simmer stirring often and adding water by the tablespoonful if the mixture is too dry. Mustard seeds should be firm and intact but pop like caviar when bitten into, about 40-50 minutes.
Remove saucepan from stove and let cool completely. Transfer to a sealable container and place in the fridge.
So what can you do with this mixture you may be asking. Well the article suggests using with charcuterie (cured meats like pancetta, serrano ham, salami, etc), sauteed greens, or in a warm bacon dressing.
I told Alex about my endeavor and he has agreed to try it when he gets home. He said it is not as weird as some of the things I have made, afterall it is only mustard seeds. It tastes slightly sweet and tangy and a little pop in your mouth. I am very excited to try this in a recipe. Maybe I will persuade my mother to try some this week when she visits!! Let me know if you make this what you use it in.
I recently watched a television program where the restaurant made their own pancetta and made it look pretty easy. That got me to thinking. Could I make my own pancetta? Or would it be too difficult to manuever? I suppose before I begin I should talk to you about pancetta and what it is. Pancetta is mostly oftenly referred to as Italian bacon. It is an unsmoked, salt cured pork belly. And it needs to be immersed in a spiced salt mixture and then hung to dry. While I knew I could find the pork belly and I knew I could cure it well, did I have the place to let it hang dry? Well I had no cellar or basement or anything of the sort but I figured I could find a dark cool place somewhere in my house and decided that I had nothing to lose so I would give it a shot!

First things first you need to get yourself some pork belly. I have found some very nice pieces at the Commissary on base. It is not a whole slab of pork belly but I think this works out better. You get manageable sizes pieces of pork belly in which to cure. It also fits inside a ziploc bag much better. If you want a large size of pork belly then by all means go ahead but it will require more salt mixture than I am outlining as well as a longer cure and dry period.
And now that you have your pork you need a salt mixture. Here is the recipe I used for 2 small pieces of pork belly.
2T pink salt
1/4c kosher salt
2T brown sugar
4T black pepper
2T juniper berries
4 bay leaves
1t nutmeg
4-5 sprigs of thyme
This is not an exact recipe. You can use any spices you like in here. You can use fenugreek, fennel, hot pepper spices, or more black pepper or any other version you like. This was just my first attempt at a basic run of the mill salt blend.
Trim the skin off the side of the pork belly.
Mix all the spices together and rub into every part of of the pork belly. Once you have it all rubbed in, place the pork into a large ziploc bag. You want to let this marinate for 7-10 days in the refigerator. You may want to shake the bag or flip the bag over once a day. I let mine marinate for 9 days.
Once your meat has cured in the fridge you need to rinse every bit of the salt mixture off the meat. Use your fingers to rub off all the salt mix. Lay it on a paper towel to dry off.
Pat off all the excess water and grab some kitchen twine and roll up your meat. I rolled mine width wise. Make sure and leave a loop at the end of the string so you can hang it by a hook to dry. Your meat will need to hang for about 2 weeks.
I screwed a hook into my ceiling in what I believe is called the breakfast room. I put it in the corner of the room. It is generally kept dark because no one uses it much and the blinds stay closed. It stays cool because its not too close to kitchen to get that heat and with the blinds closed no heat comes in that way either. It is also fairly close to the vent. But basically you need to find a place where it will stay cool and dark. Or as cool and dark as you can get. I also placed a plate with a paper towel on it to catch any fat or juices that come out of the pancetta.
I forgot to take off the skin on my meat so about a week into my drying process I pulled it off and removed the skin and then let it hang for another week.
I took the smaller of my pancetta up to my Dads and sliced it paper thin and tried it out. I told my Dad that since I had never tried this I did not know if 1) it would be good or 2) it would make us violently ill. But he was willing to take the chance and so was I. And no one got ill!

It was nicely salty and yet maintained its porkiness. It did have some more dried out pieces on the edges of the meat. But I think when you make homemade foods you take all that with a grain of salt. You realize it is not the perfect prepackaged meats you buy in the store and just cut it off or chew it like jerky! But now that I know for sure that this is a process that works for me I can experiment around with different salt mixtures. I am going to try a salt cured pork belly but once rinsed I am going to one side in cracked black pepper and let it dry. That way you get some nice black pepper taste like you do when you buy deli style pastrami. But the best part is the price to make this. I spent between $1-3 a piece for my prok belly pieces. And I had all the spices on hand. You may have to buy some salt if you are making large pieces but overall it should be stuff you have in your pantry. And that means I spent probably $5 for my two pieces of pork belly. And when you go to the store to buy pancetta you spend $5 for maybe 6-8 slices. So I am coming off on top! If you like cured meats then I absolutely recommend trying this recipe out!
Have you ever looked at a restaurants menu online and realized you absolutely had to have something on there? And then you realize with sadness in your heart that that particular restaurant is no where near you! That's how I feel right now. I recently looked up California Pizza Kitchen's menu and locations. Having come from Las Vegas where there are at least 2-3 in the city and lost more in other cities around the area I was hoping to find a location close to us where I could have some more yumminess. But sadly the closest one is in Jacksonville, FL or Birmingham, AL. I suppose when we visit my mother-in-law we could eat at the one in Jacksonville but that does not really help me right now. Well against my better judgement I went ahead and looked at the menu. Turns out CPK has a new dessert on the menu. A 6 layer lemon cake with lemon custard and limoncello in between the layers and a mascarpone frosting and a blueberry coulis drizzled around. You know what.....I am not explaining it correctly. Click HERE!
 |
| CPK version |
Now that you have cleaned off the computer screen from the drool and come back to reality you probably want to have a piece of that too! So that is where I come in. I set right to work figuring out a set of recipes to make this dish. And here is what I have come up with.
Lemon Curd:
As with the lemon danish I used Martha Stewarts lemon curd recipe which can be found here. I doubled the recipe to use for the filling on this recipe.
Limoncello:
I did not use any of this. I thought about it. But I didnt have any limoncello on hand and didnt go looking for any so I omitted it although I am sure brushing it lightly on the cake before layering on the curd would be good.
White Cake Recipe:
1c butter, softened
2c sugar
3 1/2c cake flour
3t baking powder
1c milk
1t vanilla
8 eg whites, beaten stiff
Preheat oven to 350 degrees. Grease and flour 2 round cake pans.
Cream together butter and sugar until fluffy.
In a medium bowl combine flour and baking powder. Add half of the flour mixture to the butter mixture. Then add the milk and vanilla. Finally add in the remaining flour mixture. It will be thick and resemble a bread batter right now. Take your beaten egg whites and gently fold 1/3 of the mixture in at a time. Make sure all of the egg whites are thoroughly incorporated.
Pour the batter into the two prepared cake pans. Bake for 30-40 minutes or until toothpick inserted comes out clean.
Remove from pan and cool on a wire rack.
Mascarpone Frosting:
Now I doubled the recipe thinking I needed more and I think I did but I did have quite a bit left over. So use your own judgement on doubling the frosting recipe.
8oz mascarpone cheese
1/2c confectioners sugar
1c heavy whipping cream, beaten stiff
Mix together the cheese and sugar until smooth and creamy, Gently fold in the whipped cream until fully incoprorated.
ASSEMBLY:
Take your cake plate and tear off 3 small 2-3inch wide strips of parchment paper and lay in a diamond shape. Do not place directly on the center of the plate though. This will keep the frosting and crumbs from spoiling your plate. Once you are done you gently remove the paper from the sides of the cake and throw away.
Take a round cake and slice gently into thirds. Take the bottom third and gently place on the bottom of the cake plate. Take 1/4 of the lemon curd and spread almost out to the edge. Take the middle third cake and place on the lemon curd. Spread with another 1/4 of the lemon curd. Then place the top third of the cake on the lemon curd. Spread with some of the frosting.
Take your other round cake and cut into thirds and repeat the process. Spread some frosting around the edges of the cake and smooth out. Place in the fridge to keep cool and set up.
Blueberry Coulis:
1 pint of blueberries
1/4-2/3c water
2-3T sugar
1t lemon juice
Combine all ingredients on a small pot and cook on medium for 10 minutes until gently boiling and berries start to burst. Using an imersion blender (or other blending device), puree the mixture. Let it cool and then strain to remove all the seeds and pulp.
Candied Lemon Peel:
Using a peeler, peel off the lemon skin. It is okay if you get some pith in it. One the peel is off take a small knife and scrape off the pith until none is left. I wanted small strips so I sliced the peel into thin ribbons.
In a small pot place equal parts water and sugar and bring to a boil. Place in the lemon peel and simmer for 15-20 minutes or longer if larger pieces. You want the peel to be tender when you eat it. Remove from the boil water and gently dry. Roll in sugar and let it dry out.
Take your cake and cut into slices. When placed on a plate garnish with candied lemon peel and drizzle some blueberry coulis around the plate.

You know aside from the sauce being a little thinner and not as prettily drizzled, I think mine looks spot on! And you know something else? It tasted really good too! After driving to my Dads house and having a wonderful meal of grilled pork and veggies what naturally comes for me is dessert and this one was really good. The lemon flavor was neither too aggressive or not there. You got enough lemon sharpness without it covering up all the other tastes in the cake. And I am glad I went with a lemon curd instead of lemon custard. I prefer the sharpness of the curd. The cake might have had a little too much vanilla (Im a cook not a baker so I didnt measure my vanilla out like I stated to do in the recipe) but my Dad prefered it that way. And the frosting was light and airy and not too sweet. So you didnt have the overly sugary sweetness of a frosting to compete with the other flavors. And blueberry naturally goes with lemon and it went really well to dip your cake bites in. But you know it wasnt entirely necessary. It does look pretty with it though. Oh and the candied lemon peel? It tastes great on its own, it looks lovely sitting atop the cake, but it kinda gets in the way when eating the cake. I guess thats why it is the garnish instead of integrated into the cake. But overall I would take the time to make this again. And if you are feinding for this cake, it really isnt that hard. It just take a little patience to get all the components together. But hey good things in life (like this cake) come to those who wait! Enjoy it!!
Well strawberries are in season and they are lovely looking. The kids love them too. And I had to finagle some away so they wouldnt eat them all. I am not kidding that I bought a large carton of strawberries and they were eaten in one sitting in one day by the kids!! I dont even wanna think about how much they are going to eat in 10 years!! But I digress. So back to strawberries. I saw this recipe in my Cooking Light magazine and it looked absolutely divine so I knew I had to try it!! And it is easy. Shocker right?! Most of the foods I make are time consuming some even taking days to prepare before they are ready to eat. But this my friends is an exception!! Anyone could make this is 20 minutes and be eating it 30 minutes after that (time to let it chill). So hop on in the kitchen and get ready to whip up this tasty concoction!
Recipe:
20-25 oreos
5T butter, melted
1pkg low fat cream cheese, softened
3/4c-1c powedered sugar
1t vanilla extract (I used fresh vanilla bean and scraped out the inside)*
2c fat free cool whip
1/2c strawberry jam
1/2 lemon, juiced
2t juice (I used the kids berry juice but apple would be fine too)
1lb strawberries, quartered
*if you want to use real vanilla beans, make sure they are fresh (soft and supple) and take a sharp knife and run it down the length of the bean and gently use the blade to scrap out all the black seeds. Place the seeds in your mixture like you would the extract.
Pulse oreos through a food processor until fine crumbs. If you do not have a food processor pound those suckers out with a mallet, cup, bowl, or other utensil until you have small fine crumbs. Pour crumbs into a buttered pie plate. Add the melted butter and mix. Press gently into your pie plate on the bottom and around the edges. Place in the freezer to set up while you make the middle layer.
In a large bowl combine with a mixer cream cheese, sugar, and vanilla until smooth and fluffy. Gently fold in your cool whip until it is all incorporated. Layer on top of your oreo crust.
**in case you didnt know how to properly fold in something like whipped cream or whipped egg whites make sure you go slowly and only go in one direction so as not to deflate your whipped product. There needs to be no streaks of whipped cream showing.
Take your jam and microwave on high for 20 seconds until is is softened slightly. Add your lemon and other juice. Whisk to incorporate thoroughly.
Take your strawberries and place in the glaze and toss to coat. Arrange your strawberries on top of the cream mixture. Place in the fridge for at least 30 minutes to chill. (if you had any fresh mint it would look very nice either on top of the pie or on individual slices)

So how did I like it? Oh man Im gonna be sick tonight it was so good! My digestive system doesnt always like dairy and this is loaded with it and with the amount I ate I am gonna hurt, but it was absolutely worth it! I got not only Anthony to eat a few bites of it but Vinnie as well!! Who knew that my little pickiest of picky eaters would try it. But after he saw his brother take a bite he felt brave enough to try and actually had more than his brother. So I guess all around it was a huge hit in my house! I explained it to Alex and he seemed to think it would be good so I guess I have a simple recipe for summer dessert when he gets home in July! So hope you have a nice big slice for yourself and let me know how you like it!!
This is a post for everyone who loves bagels and Panera. I have recently been introduced to Paneras French Toast Bagel. It is not done like french toast, it just tastes like french toast. And it is highly addictive. I find myself dropping off the kids and driving to Panera just for the bagel and a glass of tea more often than i should. And while sometimes I get the bagel for free and sometimes I get the tea for free it is not as cheap as eating at home. So I got to wondering if I could make a bagel that tasted like Paneras cheaper. So I started my bagel hunt. Youd be suprised how many recipes pop up for bagels done french toast still rather than french toast tasting bagels. I finally settled on a basic recipe and then did some additional tweaking.
Bagel:
1pkg dry yeast
2 1/4c warm water
1/4c sugar
6-7c bread flour
1T cinnamon
1T salt
1T vegetable oil
1T maple syrup
1 egg, beaten
Combine water, 1T sugar, and yeast in a small bowl and mix together. Let sit for at least 10 minutes until yeast begins to foam.
In a large bowl combine flour, salt, remaining sugar, and cinnamon. Make a well and add the yeast mixture, vegetable oil, vanilla, and maple syrup. Once mixed knead together for 10 minutes until it forms a smooth ball. Place in a well oiled bowl and cover with a towel to keep from drying out. Let it rise for 1 hour in a warm place.
French Toast Paste
1 1/2T cinnamon
4T brown sugar
1/2T nutmeg
1t vanilla
maple syrup
Mix together the cinnamon, sugar, and nutmeg together. Pour in some maple syrup until your mixture forms a thick slightly crumbly paste. Add in your vanilla and mix together well. Set aside until time to use.
Punch down your risen dough and divide into 3 equal parts. Take each third and divide into 5 equal parts. You may get more or less depending on how equal your parts turn out. Even if you have the exact number of balls and I did they may be different sizes. So do whatever you like the best. Take the 5 equal parts and on each piece of dough place a tablespoon of the french toast paste on the ball.
Knead together and form into a ball. Take your thumb and make a hole in the center. You may want to fold the dough through the center of the hole to get a better look. Place on a lined baking sheet. Once you have done this with all 15 pieces cover with a towel and let rise for another 30 minutes.
Preheat your oven to 500 degrees.
Take a large pot of water and bring to a boil. Add 2T honey to the water. Place 1-2 bagels into the boiling water and let cook for 45 seconds to 1 minute.
Flip it over and cook another 45-60 seconds. Remove from water and place on a greased cookie sheet. Continue with remaining bagels.
Take your egg and if you want a slightly sweet top then add 1T or more of maple syrup or honey to the egg. Brush each bagel top with the egg wash mixture. Place in the oven and bake for 10-15 minutes or until the bagels are browned.
At this point any unwanted bagels should be placed in a freezer bag and frozen until ready to eat. These will last for 6 months if sealed well. Take baked bagels not to be frozen and slice in half and toast. Eat with cream cheese.
The verdict? They were good. I wish I had added more of the french toast paste to each bagel. There was a small vein of the paste running through each bagel but not enough for my tastes. So next time I will add more. Perhaps I should have just add everything into the bagel and not done the paste separately but I like the looks of veins of flavor running through breads, I just wish there had been more flavor veins. but overall I am very happy with my bagels. I cannot wait to finish these and make different flavors. So if you like bagels like I do and want to experiment with flavors not found in grocery stores then try this. And enjoy!!